
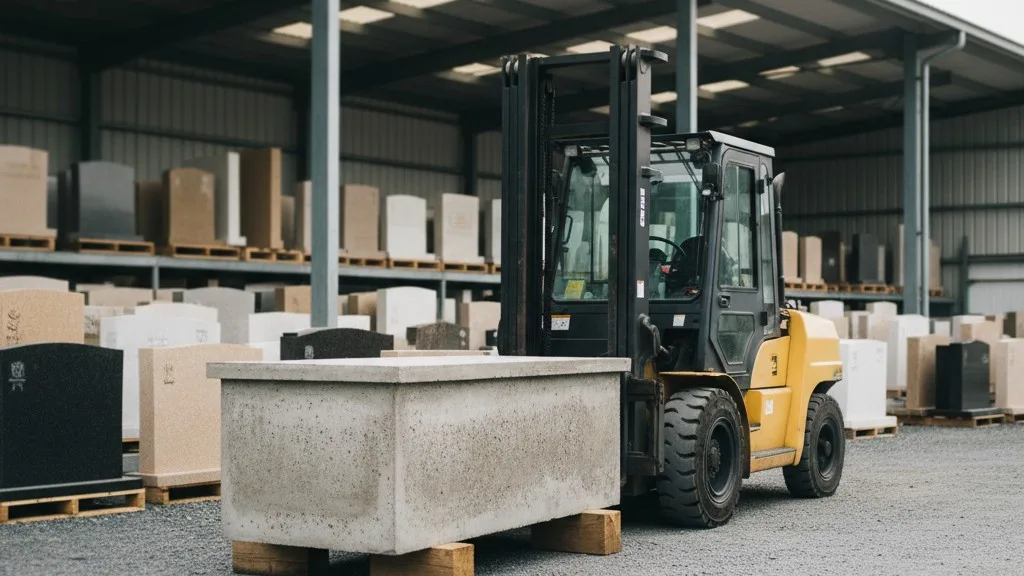
Unloading a 3,000-pound burial vault is a routine task that carries significant risk. A mistake can lead to damaged inventory, broken equipment, or serious injury. Prioritizing vault unloading safety isn't just about following rules; it's about establishing a clear, repeatable process that protects your team, your equipment, and your business.
This guide breaks down the procedure into manageable steps, from pre-arrival checks to final storage. Whether you're training a new team member or refining your shop's existing safety protocols, a documented workflow is your best defense against accidents and errors.
Before the Truck Arrives: Your Pre-Unloading Checklist
A safe lift begins long before the delivery truck pulls into your yard. The administrative and logistical work done beforehand sets the stage for a smooth, predictable operation. Rushing this stage is a common cause of downstream problems, from having the wrong equipment ready to not having enough space to work.
First, confirm the details of the incoming shipment. Your team needs to know exactly what is arriving and when. This includes the number of vaults, their specific types and weights, and the estimated time of arrival. This information dictates the equipment you'll need, the personnel required, and where in the yard you plan to stage the delivery. A last-minute scramble because the truck arrived an hour early is a recipe for mistakes.
Next, prepare the unloading zone. The area must be clear of all obstacles, including other inventory, vehicles, and debris. The ground should be level, firm, and stable enough to support both the delivery truck and your heavy equipment. Pay special attention to overhead obstructions like power lines, tree branches, or the roof of a covered area. A designated and inspected unloading zone is a non-negotiable part of the process.
Finally, ensure your team is briefed. The equipment operator, spotter, and any ground crew should know what's expected of them. This pre-shift huddle is the time to review the plan, confirm hand signals, and discuss any unusual circumstances, like a new driver or a different type of vault. Clear communication starts here, not when the vault is suspended in mid-air.
Essential Heavy Equipment for Safe Vault Unloading
Choosing the right tool for the job is fundamental to vault unloading safety. The primary choice for most shops is a heavy-duty forklift, but boom trucks or cranes may also be used depending on the shop's layout and inventory. Regardless of the machine, it must be rated to handle the weight of your heaviest vault with a significant safety margin.
A forklift used for vaults should have a capacity well above the typical 3,000-pound weight of a standard concrete vault. Check the forklift's data plate for its load capacity at different load centers and lift heights. The forks themselves must be long enough to support the vault fully without it being at risk of tipping. Daily pre-use inspections are critical. Before every shift, the operator should check tires, fluid levels, forks, chains, and all safety features like the horn, lights, and backup alarm.
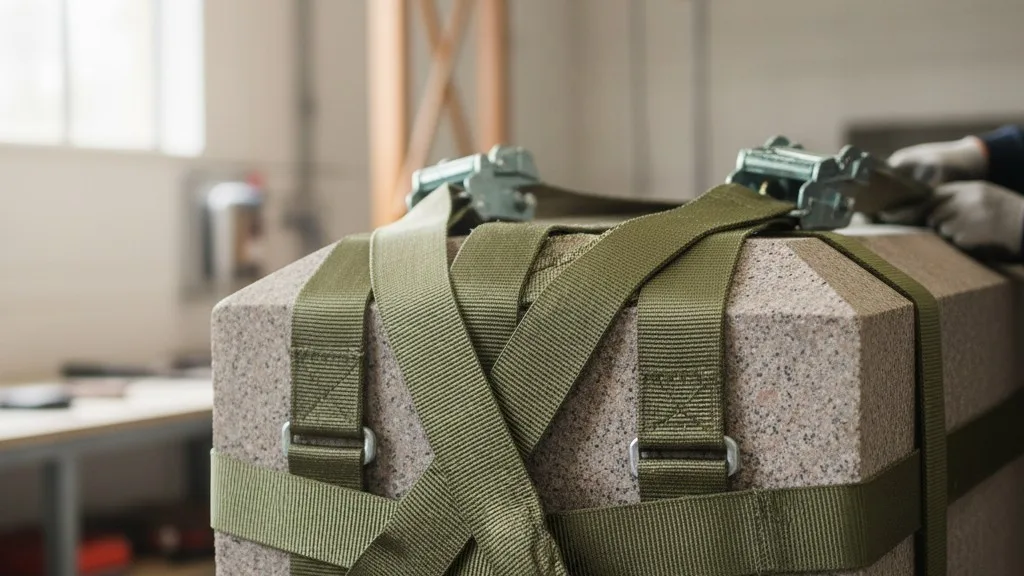
Rigging is just as important as the machine doing the lifting. Straps, slings, and chains must be rated for the load and inspected for wear, fraying, or damage before every use. Never use damaged rigging, even for a “quick move.” Using the correct spreader bars can also prevent side-loading on the vault and damage from straps squeezing it. All rigging should be stored properly when not in use, protected from weather, chemicals, and physical damage. For a deeper look at managing your physical stock, see our guide to monument shop inventory management, which has principles that apply to vaults as well.
The Step-by-Step Vault Unloading Procedure
With the site prepared and equipment inspected, the unloading process can begin. This procedure should be performed methodically, without rushing. Each step builds on the last to ensure the vault moves from the truck to the ground safely.
Step 1: Position the Truck and Equipment
Guide the delivery truck into the designated unloading zone. The truck should be on level ground with the parking brake set and wheels chocked. Position the forklift or crane so that the operator has a clear view of the truck bed, the vault, and the spotter. The equipment should be able to reach the vault without overextending and maintain stability throughout the lift.
Step 2: Rig the Vault for Lifting
The ground crew, working with the truck driver, attaches the rigging to the vault. This is a critical step where attention to detail matters. Ensure the straps or chains are placed at the manufacturer-specified lift points. The rigging should be snug and balanced, ensuring the vault will lift evenly. The spotter or operator must double-check the rigging before giving the signal to begin the lift.
Step 3: The Initial Lift and Test
The operator slowly lifts the vault just a few inches off the truck bed. This is a crucial test lift. The purpose is to confirm the vault's stability and the integrity of the rigging. The spotter should watch carefully for any signs of shifting, tilting, or strain on the straps. If anything looks off, the operator immediately lowers the vault back onto the truck to readjust. Never proceed with a full lift if the test lift reveals a problem.
Step 4: Moving the Vault
Once the test lift is successful, the operator can proceed to lift the vault clear of the truck. The movement should be slow, smooth, and deliberate. The operator's focus should be on the load and the spotter, not on other distractions in the yard. The spotter is the operator's second set of eyes, communicating with clear, standardized hand signals to guide the movement. The spotter is responsible for keeping the area clear and ensuring no one walks under the suspended load.
Step 5: Lowering and Unhooking
The operator moves the vault to the designated landing spot, which should be prepared with dunnage (wood blocks or sleepers) to keep the vault off the ground. This prevents moisture damage and makes it easier to pick up again later. The vault is lowered slowly and gently onto the dunnage. Only after the vault is stable and fully supported on the ground should the ground crew approach to unhook the rigging.
Team Roles and Communication During the Lift
A safe lift depends on teamwork and flawless communication. Every person involved has a distinct role, and they must work together seamlessly. Ambiguity or confusion can lead to disaster, so establishing clear roles is a key part of your vault unloading safety plan.

The Equipment Operator: This person is in control of the machine and the load. Their responsibility is to operate the equipment smoothly, follow the spotter's signals, and stop the lift immediately if they see or sense anything unsafe. A good operator is focused, patient, and never takes shortcuts.
The Spotter: The spotter is the director of the operation. They must have a clear view of the entire lift path, from the truck to the landing zone. Their job is to guide the operator using a set of pre-arranged, unambiguous hand signals. They are also responsible for controlling the area, keeping unauthorized personnel away, and being the only person who communicates with the operator during the lift. If the operator loses sight of the spotter, the lift must stop.
The Ground Crew: This includes the person or people responsible for rigging and unhooking the vault. They work on the truck bed and at the landing site but must stay clear of the load once it is suspended. Their work is done before the lift begins and after it is safely on the ground.
Clear, standardized hand signals are essential. Your shop should adopt a recognized set of signals (such as those from OSHA) and train every member of the team on them. Verbal commands can be misunderstood over engine noise, so hand signals provide a reliable, visual language for the operation.
Common Unloading Mistakes and How to Avoid Them
Even experienced teams can make mistakes if they become complacent. Recognizing common failure points is key to preventing them. One of the most frequent errors is rushing. Trying to beat the clock or move too quickly encourages shortcuts, like skipping pre-use inspections or failing to conduct a test lift. A culture of safety prioritizes doing the job right over doing it fast.
Another common mistake is poor communication. This can happen when there is no designated spotter, when multiple people are shouting instructions, or when untrained personnel enter the lift zone. The “one operator, one spotter” rule is critical. All other team members should know to stay clear and quiet during the lift.
Equipment misuse is also a significant risk. This includes overloading a forklift, using damaged rigging, or attempting to lift a vault at an unsafe angle. Adhering strictly to equipment load limits and conducting rigorous inspections before each use is the only way to mitigate this risk. Any equipment found to be deficient must be taken out of service immediately until it is repaired and re-inspected.
Finally, a lack of planning contributes to many incidents. Failing to check the weather, not preparing the unloading zone, or not having the right rigging on hand creates a chaotic environment where mistakes are more likely. A simple checklist can formalize the planning process and ensure nothing is forgotten. This is where having a central system for orders and deliveries becomes invaluable. Knowing a delivery is scheduled allows you to block out time and resources in advance. Many shops find that as they grow, they need a better system than paper or spreadsheets to keep track of these moving parts. A dedicated burial vault management software helps ensure that delivery information is clear and accessible to everyone who needs it, from the office to the yard.
After the Unload: Securing and Storing Vaults
The job isn't finished once the vault is on the ground. Proper storage and inventory management are the final steps in a professional receiving process. Vaults should be stored in an organized manner in a designated area of the yard. Storing them on dunnage is crucial to prevent contact with the ground, which can cause staining and make them difficult to access later.
Your storage layout should allow for easy and safe access for forklifts. Avoid creating tight, cluttered rows that require complex maneuvers to retrieve a vault. A well-organized yard is a safer yard. It also makes inventory counts and order picking much more efficient.
The final step is to update your inventory records. As soon as the vaults are stored, the receiving information should be entered into your management system. This ensures your sales team, office staff, and production managers have real-time visibility into what is on hand. In Petra, for example, receiving a purchase order for vaults updates the inventory quantities immediately, making the new stock available for commitment to new orders. This closes the loop, ensuring the physical reality of your yard matches the data your team relies on to sell and schedule work.
A Process You Can Trust
Safely unloading a 3,000-pound vault comes down to discipline and process. By preparing in advance, using the right equipment correctly, and communicating clearly, your team can turn a high-risk task into a safe, predictable routine. A documented, well-rehearsed workflow is your most valuable asset in protecting your people and your inventory.
When your process is supported by clear information, your team can work with more confidence. If you're looking for a better way to manage your vault deliveries, production, and inventory in one place, we'd be glad to show you how Petra works. Request a conversation with our team today.


