Choosing between a bevel, slant, or flush grave marker involves more than just aesthetics; it affects everything from cemetery regulations to design possibilities and installation methods. Understanding the distinct characteristics of these three common types of grave markers is critical for guiding families effectively and ensuring a smooth workflow from sale to setting. Each style presents unique considerations for your sales, design, and production teams.
While all three are set lower to the ground than upright monuments, their differences in height, angle, and design capacity are significant. Getting the details right prevents costly mistakes and ensures the final memorial is a fitting and compliant tribute. This guide breaks down the specifics of each marker type, covering the entire process from helping a family choose to final installation.
Defining the Core Type of Grave Markers: Flush, Bevel, and Slant Markers
At a fundamental level, the distinction between flush, bevel, and slant markers comes down to their profile and how they sit on the ground. This angle and height dictates their visibility, the complexity of their design, and the cemeteries where they are permitted. For your team, knowing these differences is the first step in managing customer expectations and planning production accurately.
Flush Markers (Flat Markers)
A flush marker is the simplest and lowest-profile option. As the name implies, it is set level with the turf, with only its top surface visible. These are often required in memorial parks or specific sections of cemeteries to maintain a uniform, park-like appearance and simplify groundskeeping, as lawnmowers can pass directly over them.
- Physical Characteristics: Typically rectangular, flush markers are usually 3 to 4 inches thick. Common sizes range from small individual markers (e.g., 24x12 inches) to larger companion markers (e.g., 36x12 inches or larger), but dimensions can vary widely based on cemetery rules.
- Common Materials: Granite is the most prevalent material due to its durability and range of colors. Bronze flush markers, often attached to a granite or concrete base, are also common, particularly in veterans' sections or certain memorial parks.
- Design Limitations: The flat, top-down viewing angle and limited surface area constrain design possibilities. Designs must be clear and legible from directly above. Deeply carved elements are less common, with most designs featuring incised lettering and simple emblems.
Bevel Markers (Hickey Markers)
A bevel marker is a step up in visibility from a flush marker. It is a rectangular stone with a slight, uniform slope from back to front. The back edge is raised a few inches higher than the front edge, creating a gentle incline.
- Physical Characteristics: The back of a bevel marker is typically 6 to 8 inches high, while the front is about 2 inches shorter. This creates a sloped face that is easier to read from a distance than a flush marker. They are sometimes referred to as “hickeys” or pillow markers.
- Improved Visibility: The angle helps shed water, snow, and debris more effectively than a flat marker, keeping the inscription clearer over time. It also makes the marker easier to locate in the cemetery.
- Design Considerations: The sloped face provides a better canvas for more detailed designs than a flush marker. The angle catches light differently, allowing for more interplay between polished and frosted surfaces. Lettering and simple carved elements are common.
Slant Markers
Slant markers offer the most visibility and design flexibility of the three low-profile types. They feature a steeply angled face, similar to the front of a lectern, making them much easier to read from a distance. They are significantly taller and thicker than bevel or flush markers.
- Physical Characteristics: A standard slant marker has a face that is typically 12 to 16 inches high, with a thick base that provides stability. The top edge is usually 2 to 3 inches thick, while the bottom can be 10 to 12 inches thick. They are often set directly on a concrete foundation but can also be placed on a matching granite base for additional height and presence. When placed on a base, they are sometimes referred to as a “slant on base.”
- Design Versatility: The large, angled face is an excellent canvas for detailed artwork, including complex sandblasted scenes, laser etchings (on dark granite), and sculpted elements like flowers or symbols. The upright angle makes them function much like a small monument.
- Cemetery Regulations: Because of their height, slant markers may be restricted to certain sections of a cemetery. It's crucial to confirm that a slant is permitted before finalizing a sale. Some cemeteries may have rules about whether a granite base is required or allowed.
Guiding Families: The Sales and Consultation Process
Helping a family select the right type of grave marker is a delicate process that balances their wishes, budget, and the cemetery’s rules. Your role is to provide clear information that empowers them to make a confident decision. A structured consultation prevents misunderstandings and lays the groundwork for a successful project.

First and foremost, you must verify the cemetery’s regulations. This is the most critical step and should be done before presenting any options to the family. Contact the cemetery directly to confirm the allowed marker types, sizes, materials, and any specific foundation or setting requirements for the exact plot location. Misinterpreting these rules can lead to the cemetery rejecting the marker, forcing a costly recut and causing distress for the family. A good practice is to get these requirements in writing.
Once you have the cemetery’s rules, you can present the permitted options. Use photos or, ideally, physical examples in your showroom to illustrate the differences in visibility and presence between flush, bevel, and slant markers. Explain how each type sits on the ground and how that affects its appearance over time. For example, show them how a flush marker can become obscured by grass, while a slant remains visible from the cemetery road.
Discuss design possibilities in the context of each marker type. If a family desires a detailed portrait or an intricate scene, a slant marker is often the most suitable choice among these three options. If their priority is simplicity and compliance with strict memorial park rules, a flush marker will be the only option. For those seeking a middle ground with better visibility than a flush marker but a lower profile than a slant, a bevel marker is an excellent compromise. You can find more advice in our headstone planning guide for professionals.
Throughout the consultation, document every detail. This includes the confirmed cemetery regulations, the family’s choice of marker type, granite color, and all design elements. This documentation becomes the foundation for the order. Using a system that centralizes this information ensures that your design and production teams have access to the exact specifications, which is a core principle for managing custom monument orders without error.
Production Workflow: From Granite Slab to Finished Marker
The production process for flush, bevel, and slant markers shares many steps, but the unique shape of each requires specific techniques, particularly during cutting and finishing. A well-organized workflow ensures consistency and efficiency, regardless of the marker type.
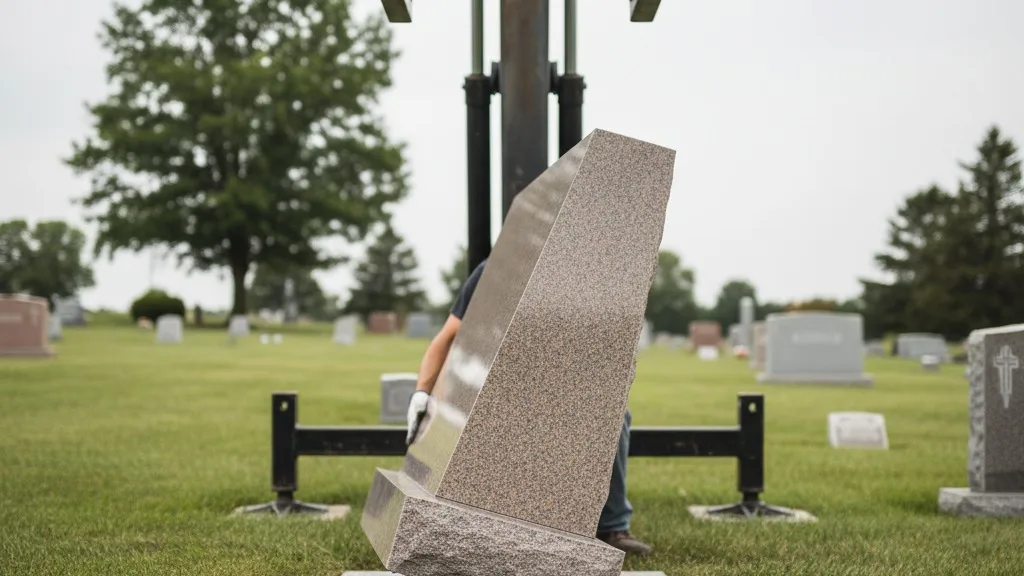
Step 1: Stone Selection and Sawing
The process begins with selecting the appropriate granite slab based on the order's specifications for color and size. The first major difference appears at the sawing stage.
- Flush Markers: These are the most straightforward. The saw operator makes simple, perpendicular cuts to create a rectangular block of the specified length, width, and thickness.
- Bevel Markers: Cutting a bevel requires setting the saw blade at a slight angle to create the sloped face. This is a more precise task, as the angle must be consistent across the entire surface. The operator must ensure the front and back heights meet the order’s specifications.
- Slant Markers: Cutting a slant marker is the most complex of the three. It involves a steep angle cut for the face and often a perpendicular cut at the back. If the marker has a