
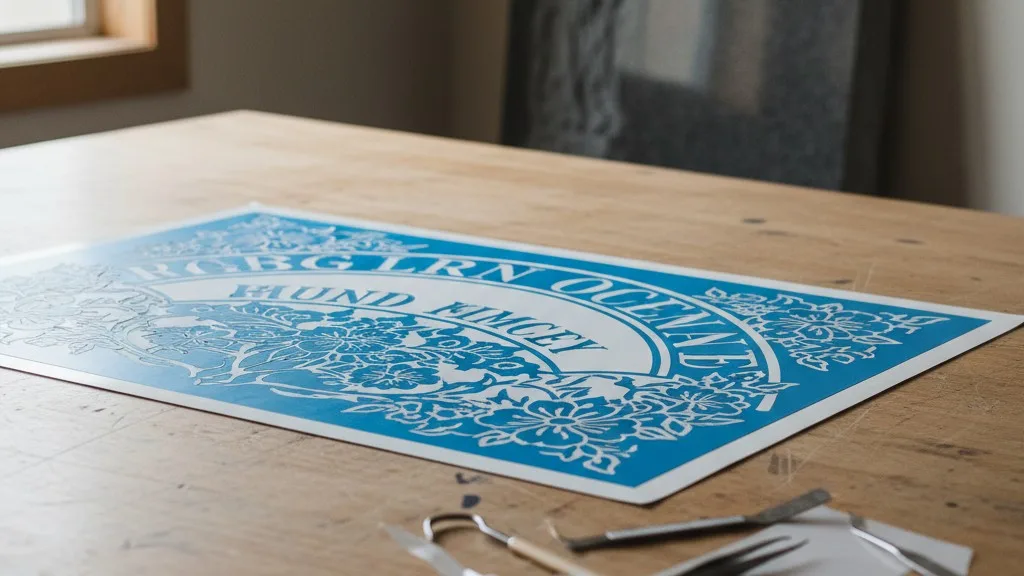
Creating a granite sandblasting stencil is the critical link between a family’s approved design and the final, enduring monument. A single error in this process—a missed detail, a slipped knife, or a misaligned mask—can lead to costly rework and painful delays. This guide provides a detailed, step-by-step walkthrough of the entire stencil creation workflow, from preparing the digital file to applying the final mask on the stone.
We will cover the tools, techniques, and common pitfalls at each stage to help your shop produce flawless stencils consistently. Mastering this process is fundamental to honoring a family’s trust and protecting your shop’s profitability.
From Approved Design to Cut-Ready File
The stencil process begins not at the plotter, but with a confirmed, final design. Before any production work starts, you must have a signed approval from the family. This document is your shop’s authorization to proceed and the definitive source of truth for the monument’s content and layout. A robust monument approval process prevents the most expensive errors before they happen.
Once the design is locked, the first production step is preparing the digital file for the stencil cutter. This is typically done in vector graphics software like CorelDRAW, Adobe Illustrator, or specialized CAD programs for the monument industry.
The primary task is to ensure the entire design is in a clean vector format. This means all text has been converted to curves or outlines, and any bitmap images (like a JPG of a custom drawing) have been meticulously traced into vector paths. The plotter’s blade follows these paths precisely, so any imperfections in the digital file will be transferred directly to the stencil. Check for common errors:
- Open paths: Unclosed shapes that will cause the plotter to stop cutting unexpectedly.
- Overlapping lines: Duplicate paths that can cause the blade to cut the same line twice, potentially damaging the stencil.
- Excessive nodes: Overly complex curves can make the plotter’s movement jerky, resulting in a jagged cut instead of a smooth one.
A crucial step that is easy to forget is mirroring the design. Because the stencil is cut from the back and applied to the stone, the design must be horizontally flipped in the software. Forgetting to mirror the file is a classic mistake that often isn't caught until the stencil is already applied, forcing you to start over.
For large or complex monuments, you may need to “panel” the design. This involves splitting the artwork into multiple sections that the plotter can handle. When paneling, it’s essential to create clear registration marks or overlapping guides that allow the sections to be perfectly aligned on the stone later.
Using a central system like Petra helps ensure the production team always works from the correct file. By attaching the final, approved design directly to the work order, you eliminate the risk of someone accidentally pulling an old draft from a shared folder or personal email, creating a single source of truth for every custom monument order.
Choosing and Preparing the Stencil Material
The physical stencil material, often called stencil mask or resist, is just as important as the digital file. It must be durable enough to withstand the abrasive force of the sandblaster yet flexible enough to conform to the stone's surface. There are many types of stencil material, and the right choice depends on the specific job.
Common stencil materials fall into a few categories based on their thickness and adhesive properties. Thinner stencils are suitable for light blasting and fine details, like inscriptions and line art. Thicker, more robust stencils are required for deep blasting, shape carving, and creating frosted panels. The adhesive also varies; some are designed for polished granite, while others have a stronger tack for rougher surfaces like sawn or steeled stone. Always check the manufacturer’s recommendations for the material you are using.
Before loading the material into the plotter, inspect the roll for any defects. Wrinkles, creases, or bubbles in the material can interfere with the blade’s path and cause a miscut. Ensure the roll is loaded squarely into the plotter to prevent it from skewing during the cutting process. A crooked feed can ruin a large section of expensive material.
The plotter's settings must be calibrated for the specific stencil material being used. The two most important settings are blade depth and cutting force (or pressure). An ideal cut goes cleanly through the stencil layer and its adhesive but only lightly scores the paper or plastic backing liner.
- Too little force: The blade won’t cut all the way through, making the stencil difficult or impossible to weed.
- Too much force: The blade will cut through the backing paper, causing the cut pieces to fall out and potentially jamming the plotter. This also dulls the blade very quickly.
Always perform a small test cut in the corner of the material before running the full job. A small square or circle is usually sufficient. After the test cut, try to weed it. If it peels away cleanly without tearing the backing, your settings are correct. This simple check takes only a minute but can save an entire roll of stencil and hours of frustration.
Cutting and Weeding the Stencil
With the file prepared and the plotter calibrated, you are ready to cut. Send the mirrored, vectorized design to the plotter. For long cuts, it's wise to stay near the machine to monitor for any issues, like the material bunching up or the blade snagging. A problem caught early is much easier to solve.

Once the plotter has finished, the next step is “weeding.” This is the manual process of removing the parts of the stencil where the sandblasting will occur. It’s a task that requires patience, a steady hand, and good lighting. The main tools for weeding are a sharp weeding pick or a specialized knife, similar to a craft knife.
Begin by carefully lifting a corner of a cut piece with your pick and peeling it away from the backing liner. Work methodically from one area of the design to another. It’s often helpful to start with the largest areas and then move to the smaller, more intricate details. Be especially careful with the centers of letters (like ‘O’, ‘A’, or ‘B’) and other small, isolated design elements, known as “islands.” Accidentally removing or losing one of these pieces can compromise the design.
Referencing a printed copy of the design or having it open on a nearby monitor is essential during weeding. This visual guide helps you confirm which parts of the stencil to remove and which to leave behind. It’s surprisingly easy to get turned around on a complex design, especially with mirrored text. Double-checking against the proof prevents you from weeding the wrong section.
If a piece of the stencil that should have remained is accidentally lifted or damaged, it can sometimes be salvaged. Carefully place it back onto the backing paper, ensuring it is perfectly aligned. You can use a small piece of transfer tape to press it firmly back into place. However, for critical areas, it is often safer to recut the stencil to guarantee a perfect result.
Applying the Transfer Tape
After the stencil is fully weeded, the next step is to apply a transfer tape (also known as application tape or pre-mask) over the entire design. This tape serves two purposes: it holds all the separate pieces of the design together in their correct positions, and it allows you to lift the entire stencil off its backing liner in one piece for application to the stone.
Transfer tape comes in various tack levels (stickiness). You need a tape that is sticky enough to lift the stencil cleanly from its liner but not so sticky that it’s difficult to remove from the stencil itself after it’s been applied to the stone. A paper-based, medium-tack tape is a common choice for most granite stencil applications.
Lay the weeded stencil flat on a large, clean work surface. Roll out the transfer tape and lay it over the stencil, starting from one end and working your way to the other. Use a squeegee or a plastic applicator to firmly press the transfer tape onto the stencil. Work from the center outwards, using overlapping strokes to eliminate any air bubbles between the tape and the stencil. Trapped air can prevent parts of the stencil from adhering properly, causing them to be left behind on the liner.
Once the transfer tape is fully applied, go over the entire surface one more time with the squeegee, applying firm pressure. This ensures a strong bond between the transfer tape and every part of the vinyl stencil. Then, flip the entire assembly over and squeegee the back side as well. This helps release the stencil from its waxy backing liner.
After squeegeeing, trim the excess transfer tape and backing liner around the edges of the design, leaving a small border of about an inch. This makes the stencil easier to handle and position on the monument. The stencil is now a self-contained unit, ready for the final and most critical stage: application to the granite.
Applying the Stencil to the Granite
Applying the stencil to the stone is where precision and preparation pay off. The goal is to transfer the stencil mask to the monument’s surface smoothly, without any bubbles or wrinkles, and perfectly aligned according to the design proof.

First, the stone's surface must be completely clean, dry, and free of any dust, oils, or polish residue. Wipe the application area thoroughly with denatured alcohol or a specialized surface cleaner recommended for granite. Any contaminants on the surface can weaken the stencil’s adhesive and cause it to lift during sandblasting, resulting in blurred edges or a complete blowout.
Next, you need to position the stencil correctly. Use a measuring tape, T-squares, and erasable marking pencils to draw light guidelines on the stone. Measure from the edges of the monument to determine the exact placement based on the dimensions specified in the approved proof. Double-check and triple-check your measurements before proceeding. An off-center design is a glaring error that is impossible to fix after blasting.
With the guidelines in place, you can use one of two common application methods:
The Hinge Method
This is the most reliable method for large or precisely placed stencils. Lay the stencil (with its backing still on) onto the stone, aligning it with your guidelines. Place a long strip of masking tape along the top edge of the stencil, taping it securely to the stone. This tape acts as a hinge.
Now, flip the entire stencil up on its hinge. Carefully peel the backing liner away from the stencil, exposing the adhesive. The transfer tape will hold the design together. Once the liner is completely removed, hold the bottom edge of the stencil taut and slowly lower it back down onto the stone. Because the top edge is fixed by the hinge, the stencil will fall exactly into its pre-measured position. Use a squeegee to press the stencil onto the stone, working from the top down to push out any air.
The Center-First Method
For smaller stencils, you can peel a strip of the backing liner from the center of the design, fold it back, and apply just the exposed center section to the stone along your alignment marks. Once the center is secured, you can peel the rest of the backing away from one side, squeegeeing as you go, and then repeat for the other side.
After the stencil is on the stone, use your squeegee to apply firm pressure across the entire surface one more time, paying special attention to the edges of all the cut areas. This ensures the adhesive has made a strong bond with the granite.
Finally, carefully peel the transfer tape off. Pull it back at a low, sharp angle, almost folding it back on itself. This helps keep the stencil material pressed firmly to the stone. If any part of the stencil lifts with the tape, lay the tape back down, squeegee the area again, and then resume peeling. Once the transfer tape is off, the monument is ready for the sandblast booth.
Final Checks and Common Pitfalls
Before the monument moves to the sandblaster, a final quality check is in order. Visually inspect the entire applied stencil. Look for any small air bubbles or wrinkles, especially along the cut edges. Use the tip of your weeding knife to prick any bubbles and a squeegee to press the air out. A tiny pocket of air can be enough for high-pressure abrasive to get underneath the stencil and ruin a crisp line.
Run your finger along the edges of the letters and design elements. You are feeling for any areas where the stencil did not adhere properly. If you find a loose edge, press it down firmly. For stubborn spots, a little bit of heat from a heat gun can sometimes help activate the adhesive, but be very careful not to overheat and damage the stencil.
Here are some common pitfalls to watch for throughout the process:
- Working with a dull blade: A dull plotter blade will tear or drag the stencil material instead of cutting it cleanly, leading to jagged edges and difficult weeding. Change blades regularly.
- Incorrect plotter settings: As mentioned, incorrect force or depth is a primary cause of failed cuts. Always do a test cut.
- Forgetting to mirror the design: A simple but costly error. Make it a mandatory step on your pre-cut checklist.
- Contaminated stone surface: Dust or oil is the enemy of stencil adhesion. A clean surface is non-negotiable.
- Rushing the application: Misaligning the stencil or trapping large air bubbles often happens when an operator is in a hurry. Taking an extra five minutes to measure and apply carefully saves hours of rework.
By building a consistent, documented process for creating and applying your granite sandblasting stencils, you reduce errors, minimize material waste, and ensure that the final memorial is a perfect tribute that your shop can be proud of.
Conclusion
A perfect granite sandblasting stencil is not an accident; it is the result of a deliberate, step-by-step process where every detail matters. From verifying the final approved design to the last press of the squeegee, each action contributes to the quality of the final carved stone. By standardizing your workflow, training your team on best practices, and performing quality checks at each stage, you can transform stencil creation from a source of potential errors into a reliable and efficient part of your monument production.
When your process is supported by a central system that connects design, orders, and production, your team can work with confidence. To see how Petra provides a single source of truth for work orders, design files, and production schedules, we invite you to schedule a conversation with our team.


